Use a file, stone, or grinder at the correct bevel and always follow safety steps.
I love gardening. Its my hobby, my pation. I use different typres of tools for my gardening works. I’ve sharpened hundreds of pruners, shovels, and blades at home for my garden and clients. In this guide I explain how to sharpen garden tools at home with clear steps, tool-by-tool instructions, safety tips, and real-world lessons. Read on to learn precise angles, the best methods for common tools, and simple maintenance routines that keep edges sharp longer.

Tools and supplies you need
Start with the right tools. Good supplies make sharpening faster and safer.
- Bench or hand file for metal edges.
- Sharpening stone or whetstone for fine honing.
- Angle guide or marker to keep consistent bevels.
- Wire brush or steel wool to remove rust and gunk.
- Clamp or vise to hold tools steady.
- Protective gear: safety glasses, gloves, and hearing protection if using power tools.
- Lubricant such as light oil for filings and to prevent rust.
Having the right supplies saves time and produces a cleaner edge. I keep a small kit in the shed and it saves trips to the shop.

Safety first
Sharpening is simple but can be risky without care. Follow basic safety rules.
- Always wear eye protection when filing or grinding.
- Secure the tool in a vise or clamp to prevent slips.
- Work slowly and avoid force; a steady stroke is safer than speed.
- Keep fingers behind the cutting edge and away from moving grinders.
- If using a power grinder, clear sparks away from flammable material and wear a respirator if needed.
Safety protects both you and the tool. I once nicked a blade by rushing; after that I always clamp tools and slow down.

Sharpening basics: angles, bevels, and methods
Understanding bevel and angle is key to how to sharpen garden tools at home. A consistent angle makes a durable edge.
- Bevel angle: Most garden tools use 20° to 30° per side. Pruners and shears take finer angles; digging tools use wider angles.
- Single-bevel vs. double-bevel: Many tools have one beveled side (pruners) or two (shovels). Follow the original profile.
- Methods: Hand filing for coarse removal, stones for honing, and bench grinders for fast reshaping. Use a wire brush to prep before sharpening.
- Lubrication: Use water or light oil on stones to carry away filings and prevent clogging.
Keep strokes consistent. Mark the edge with chalk to check where metal is removed. This simple check avoids over-grinding.
Step-by-step sharpening for common tools
Below are specific, repeatable steps for common garden tools. Each section uses simple tools you can keep at home.
Pruners (bypass and anvil)
- Clean: Remove sap and dirt with a cloth and mild solvent. Tighten pivot if needed.
- Inspect: Check for nicks or bent parts.
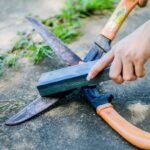
- File: Clamp the blade with the bevel facing up. Use a flat file at the original angle. Stroke away from the cutting edge in one direction.
- Hone: Use a fine sharpening stone to remove burrs and refine the edge with light strokes.
- Reassemble and oil: Wipe clean and add a drop of oil to the pivot.
Pruners need light angles and careful control. I sharpen mine after every 100 cuts in wet wood.
Loppers and hedge shears
- Clean and clamp each blade.
- Use a mill file to match the existing bevel. One-direction strokes give a consistent edge.
- Remove burrs with a fine stone on the flat side.
- Check alignment and adjust the pivot screw for clean closing.
Hedge tools tolerate a slightly coarser edge than pruners. Keep them sharp to reduce strain when trimming.
Shovels and spades
- Remove dirt and rust with a wire brush.
- Clamp the blade in a vise with the edge accessible.
- Use a large flat file or bench grinder to re-profile the edge at about 30°.
- Finish with a coarse stone and then a finer stone to smooth roughness.
- Apply a rust inhibitor or a thin coat of oil.
Sharper shovel edges slice roots and soil easily. I saved hours by sharpening a dull spade before heavy digging.
Hoes and garden forks
- Clean metal and clamp the tool.
- File the edge to restore the original bevel, typically 25°–30°.
- For forks, check tines for straightness and touch up each tine separately.
- Remove burrs and oil lightly.
Hoes benefit from a narrow edge for slicing weeds. Regular touch-ups keep weeding quick and painless.
Lawn mower blades
- Remove the blade following the mower manual and mark orientation.
- Balance the blade by placing it on a nail; file metal from the heavier side only.
- Use a bench grinder for major reshaping and a file for finishing.
- Rebalance and reinstall with proper torque.
A balanced mower blade cuts cleanly and protects the engine. I mark blade direction so I always reinstall correctly.

Maintenance and care after sharpening
Sharpening is half the job; maintenance keeps tools working longer.
- Clean tools after each use to prevent sap and soil build-up.
- Lightly oil metal surfaces to prevent rust.
- Store tools dry and off damp ground.
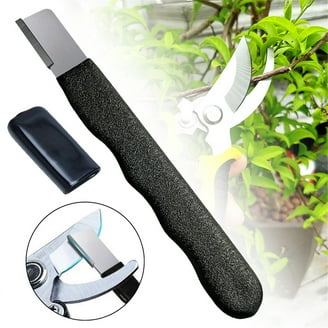
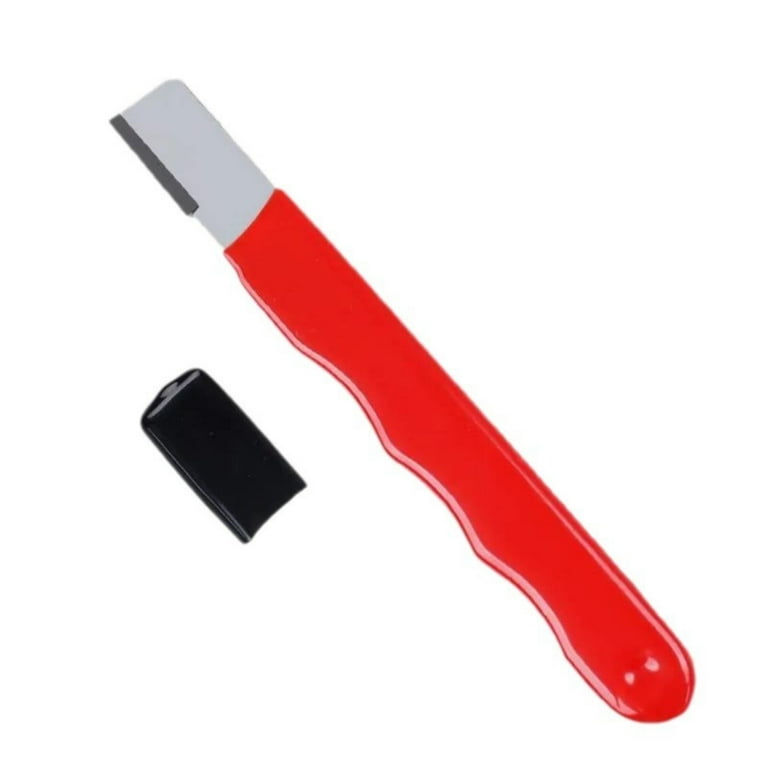
- Touch up edges often with a small diamond sharpener or stone.
- Tighten pivots and replace damaged components promptly.
Regular small maintenance means fewer full sharpenings. I touch up pruners after a day of heavy pruning and do deeper work monthly.
When to repair or replace tools
Not every dull tool needs sharpening. Know when it’s time to repair or replace.
- Repair: Small nicks, dull edges, loose pivots, and minor rust are fixable at home.
- Replace: Severe warping, broken teeth, or missing parts often justify replacement.
- Cost-benefit: If the tool is low cost and extensively damaged, replacement can be cheaper than labor and parts.
I once tried to straighten a warped shovel. It cost more time than buying a new one. Save repair for tools with good handles and intact heads.

Cost, time, and benefits
Sharpening at home is affordable and rewarding. Key points to consider:
- Cost: Basic kits run low-cost. Files and stones are inexpensive and last years.
- Time: A quick touch-up takes 5–10 minutes. Full regrinds take 20–40 minutes per tool.
- Benefits: Sharper tools reduce effort, improve cuts, and extend tool life. They also protect plant health by making cleaner cuts.
Sharpening pays back in time saved and better results during gardening seasons.

Personal experience and practical tips
Here are lessons I learned from years of working on tools at home.
- Mark original bevels with a marker. This prevents over-grinding.
- Work in a clean, well-lit area. You will see metal removal better.
- Use consistent strokes and count them for repeatable angles.
- Keep a single small stone for quick touch-ups in the shed.
- Avoid cheap grinders that overheat edges; they can ruin temper.
My early mistake was overheating a blade with a grinder. The edge lost hardness and dulled quickly. From that point I always cool metal and use stones for final honing.

People also ask
How often should I sharpen garden tools at home?
Sharpening frequency depends on use; light tools may need touch-ups every few weeks, while digging tools can go months. Check edges before heavy work and touch up as needed.
Can I use a file for all garden tools?
A file works for many tools but may be slow for large reshaping. Use stones for finishing and grinders only for heavy metal removal while avoiding overheating.
What angle is best for pruning tools?
Pruning tools usually need a 20° to 25° bevel for a sharp, durable edge. Match the factory angle when possible for best performance.
Frequently Asked Questions of how to sharpen garden tools at home
How do I remove rust before sharpening?
Use a wire brush, sandpaper, or a rust remover to clean metal. Clean surfaces let you see the true edge and sharpen evenly.
Is a bench grinder safe for garden tools?
A bench grinder is safe when used carefully and cooled frequently. Avoid overheating the blade, and finish with a stone to restore the edge.
Can I sharpen both sides of a blade?
Match the original blade geometry. Some tools use a single bevel; others use double bevels. Always follow the existing profile.
How do I check blade sharpness safely?
Use a simple paper test or shave a thin edge of wood to test cut quality. Never test sharpness with your fingers.
Do I need professional sharpening services?
You don’t need them for routine sharpening. Professionals help for complex re-profiles, expensive blades, or tempering issues.
Conclusion
Sharpening garden tools at home saves money, improves results, and makes outdoor work easier. Follow safe practices, learn the right angles for each tool, and keep a small sharpening kit in your shed. Start with simple touch-ups and build confidence; your tools will last longer and your garden will look better for it. Try sharpening one tool this weekend, share your results, and subscribe or leave a comment to keep the conversation going.