The best way to trim puppy nails is tiny weekly clips with treats and sharp clippers.
Puppy nails grow fast, and good care starts early. As a trainer and pet care writer, I have helped many families learn the best way to trim puppy nails without fear or fuss. This guide breaks down tools, steps, and training so you can master the best way to trim puppy nails with calm, safe, and repeatable habits.
Why nail care matters for puppies
Healthy nails help balance, posture, and joint comfort. Long nails change how a puppy stands and walks. That can strain the toes and even the spine. In bad cases, nails split, catch on rugs, or tear the dewclaw.
Know the nail parts before you start. The quick is the blood and nerve center inside the nail. In light nails, it looks pink. In dark nails, you must go slow and read the nail tip as you trim.
Signs nails are too long:
- You hear taps on hard floors.
- The nail touches the ground when your puppy stands.
- Your puppy slips, licks paws, or avoids stairs.
Clear anatomy and careful habits set the best way to trim puppy nails apart from guesswork. Veterinary groups agree on short, frequent trims to protect the quick and reduce stress.
Essential tools for safe, stress-free trims
Good tools make the job easy and kind. Use the right size for your puppy and keep everything clean and sharp.
Must-haves:
- Scissor-style clippers for clean cuts on small nails.
- A quiet rotary grinder for smoothing and black nails.
- Styptic powder or cornstarch to stop minor bleeding.
- High-value treats or a lick mat for steady rewards.
- A non-slip mat and a towel to support the body.
- A small flashlight or headlamp to backlight the nail.
- A nail file to smooth edges after clipping.
Check clippers every month. Replace if they crush or pinch. Wipe tools after each use. Strong, sharp tools reduce pressure and help you follow the best way to trim puppy nails with confidence.
Step-by-step: the best way to trim puppy nails
Set the stage:
- Exercise your puppy so energy is low.
- Pick a bright, quiet room with a non-slip mat.
- Place treats within reach. Turn on soft music if that helps you both relax.
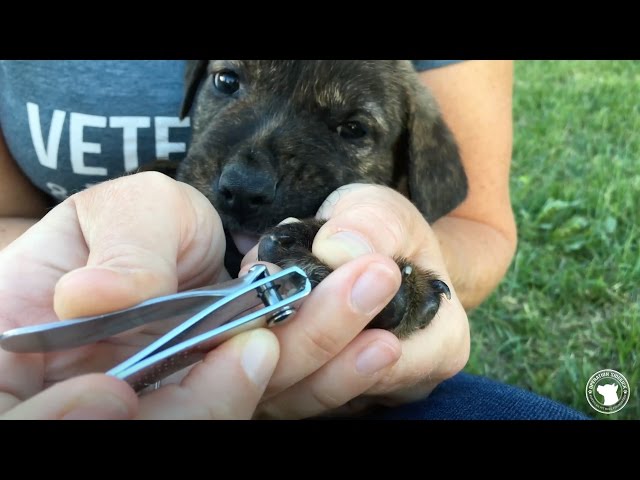
Practice handling:
- Touch a paw. Treat. Lift a toe. Treat.
- Hold the paw close to the body for support. Keep your grip soft and steady.
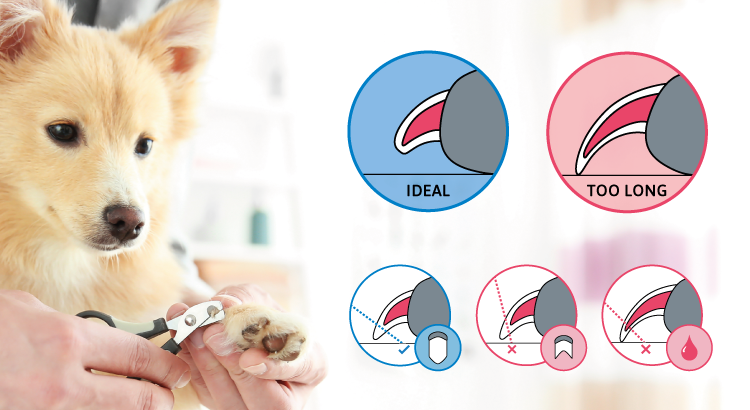
Find the safe cut zone:
- For clear nails, stop before the pink quick.
- For dark nails, trim a thin sliver at a time. Look for a small gray or white ring on the cut surface. Stop when you see a moist dark dot in the center.
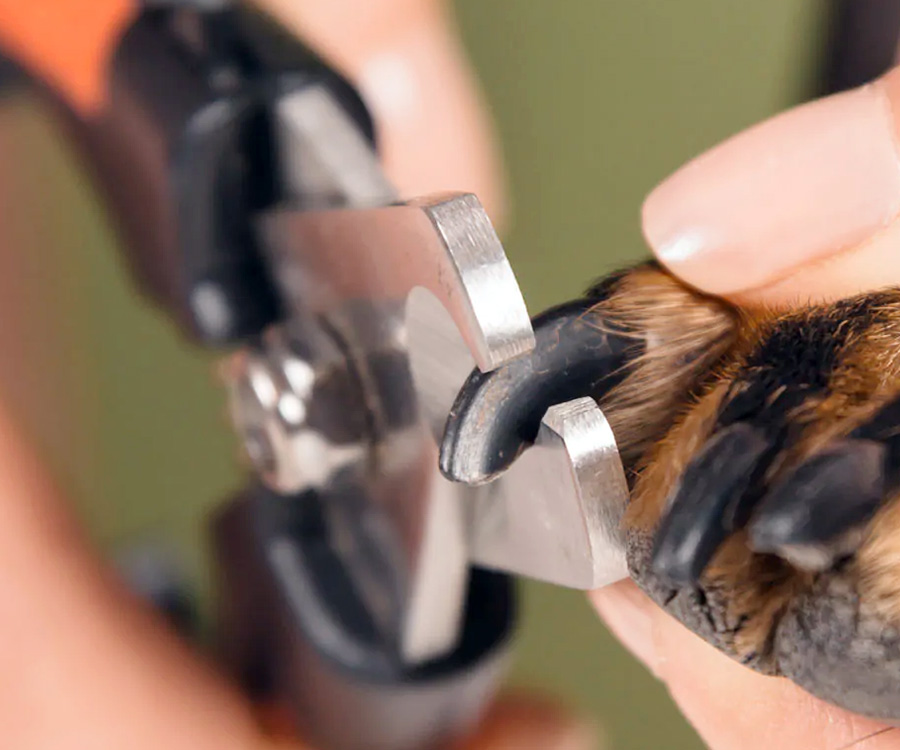
Trim tiny amounts:
- Hold the clipper blades perpendicular to the nail to avoid crushing.
- Take 1–2 millimeters at a time. Pause, check, and reward.
- Keep the blade near the tip, not the sides.
- Smooth with a grinder or file for snag-free edges.
Work in a smart order:
- Start with the easiest paw.
- Do one or two nails, then a reward break.
- End on a win, even if you only did a few nails.
Grinder tips:
- Touch the grinder for one second per pass.
- Keep hair away with your fingers or a sock with toe holes.
- Let the nail cool between passes to avoid heat.
Check dewclaws each time. These grow fast and can curl. A calm, low-pressure rhythm is the best way to trim puppy nails and build trust for life.

How to avoid the quick and handle bleeding
The quick grows with the nail. Short, frequent trims help it recede. This is why weekly micro trims are safer than rare big cuts.
If you nick the quick:
- Stay calm and speak softly.
- Press styptic powder on the tip for 30–60 seconds.
- Keep your puppy still on the mat until the clot sets.
- Skip water play for the day. Do not wipe the clot.
A nick is common and not a failure. Pause, treat, and stop the session. This calm response is part of the best way to trim puppy nails without fear.

Desensitization and fear-free training
Training is as key as tools. Pair every touch with pay. Your puppy will learn that nail care means good things.
Daily two-minute routine:
- Touch a paw, treat. Lift a toe, treat. Open the clipper near the paw, treat.
- Tap the nail with the clipper or grinder off, treat.
- Turn the grinder on across the room, treat. Move closer over days.
Add a consent cue:
- Offer your hand. When your puppy places a paw, trim one tiny tip, then reward.
- If the paw pulls back, pause. Wait for calm, then try again.
This stepwise plan is the best way to trim puppy nails for shy or wiggly pups. It follows behavior science used by vets and trainers.
How often to trim and age-specific tips
Puppies need trims more often than adults. Nails grow fast, and the quick grows too.
General timing:
- Do tiny trims every 3–7 days for young puppies.
- Active pups on rough ground may need less. House pups often need more.
- Aim for short, rounded tips that do not touch the floor at rest.
Age notes:
- At 8–12 weeks, focus on touch and treats, plus a few tips each session.
- At 3–6 months, keep weekly trims so the quick stays short.
- During rapid growth, check dewclaws twice a week.
Small, steady work is the best way to trim puppy nails and keep the quick short for life.

Common mistakes to avoid
These errors cause stress and slips. Skip them and your sessions will feel easy.
- Taking off too much at once. Trim tiny tips instead.
- Using dull clippers. Replace blades before they crush.
- Rushing the job. Break it into short wins with treats.
- Poor footing. Always use a non-slip mat or yoga mat.
- Skipping dewclaws. Check and trim them every time.
- Holding the paw out and away. Support the limb close to the body.
- Trimming only when nails are very long. Regular micro trims are safer.
Avoiding these traps helps you follow the best way to trim puppy nails with calm and control.
When to see a groomer or vet
Some cases need a pro. That is smart care, not defeat.
Seek help if:
- Nails are very long with an overgrown quick.
- Nails are black and you feel unsure even after practice.
- Your puppy shows strong fear, growls, or snaps.
- There is pain, limping, or a split or torn nail.
- You suspect a bleeding issue or chronic infections.
Ask for a fear-free groomer or a vet who uses low-stress methods. They can also show you the best way to trim puppy nails step by step and set a safe schedule.
Frequently Asked Questions of best way to trim puppy nails
How do I find the quick on black nails?
Trim a tiny sliver at a time and check the cut face. Stop when you see a small dark dot or a moist center ring.
Are clippers or grinders better for puppies?
Both work well when used right. Clippers are fast for tiny tips, and grinders are great for smoothing and black nails.
What if I cut the quick by accident?
Apply styptic powder and gentle pressure for up to a minute. Keep your puppy calm and stop for the day.
How often should I trim puppy nails?
Do small trims every 3–7 days at first. Frequent, tiny cuts help the quick recede and reduce stress.
When can I start trimming my puppy’s nails?
Start light handling and pretend trims in the first week at home. Add real tiny cuts once your puppy is calm with paw touches.
Do walks on concrete replace nail trims?
They help, but they rarely reach all nails or dewclaws. Most puppies still need regular trims.
How do I stop my puppy from wiggling during trims?
Use short sessions, steady treats, and a non-slip mat. Train a calm hold and end on a win each time.
Conclusion
Short, calm, and often is the winning formula. Use sharp tools, steady rewards, and tiny cuts. Read the nail, protect the quick, and keep each session brief and kind. This is the best way to trim puppy nails and build trust that lasts.
Start today with one nail and one treat. Set a weekly routine, track progress, and reach out to a vet or groomer if you need hands-on help. Want more step-by-step guides? Subscribe for updates or share your trimming wins and questions in the comments.