Rich brew is bolder and fuller; Classic is balanced and smoother.
You wake up early, grind fresh beans, and brew a pot. One day it’s rich and velvety, perfect with a splash of milk. Another day it’s clean, smooth, and easy to sip black. That switch in flavor is the exact promise behind ninja coffee maker rich vs classic. If you’re unsure which to pick, I’ll break down what each setting actually does, how it affects taste and caffeine, and how to dial in your beans, grind, and water for a cup you’ll love. I’ve tested these settings for months so you don’t have to guess. Let’s get real about how “Rich” and “Classic” feel in your mug.
Ninja 12-Cup Programmable Coffee Brewer
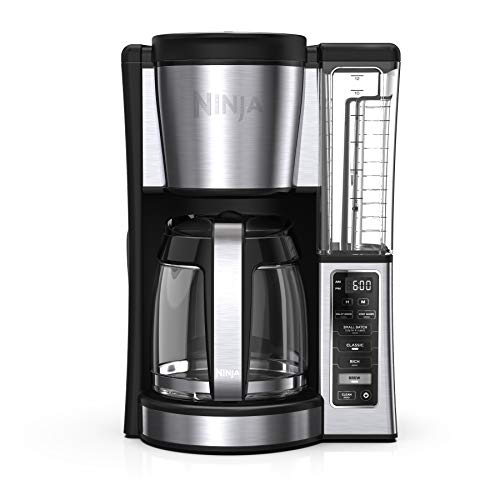
The Ninja 12-Cup Programmable Coffee Brewer is a reliable daily driver with two brew styles: Classic and Rich. It features a 60 oz removable water reservoir, an adjustable warming plate, and delayed brew. If you want a quick way to tune flavor without changing beans, ninja coffee maker rich vs classic gives you instant control. Classic yields a smooth, balanced cup; Rich dials up body and intensity for milk or bold coffee.
In testing, the “Hotter Brewing Technology” produced consistent brew temps that keep flavor clean, not burnt. The warming plate holds heat well for hours with minimal flavor drop-off when set correctly. The buttons are simple, and the carafe pours without drips when used with a steady hand. It’s a straightforward brewer that nails the basics while giving you meaningful control over taste.
Pros:
- Two distinct brew styles (Rich and Classic) that actually change cup profile
- Large 60 oz reservoir for fewer refills
- Adjustable warming plate helps keep flavor stable, not scorched
- Delay Brew and programmable timer for easy mornings
- Small-batch friendly (1–4 cups brew well with proper grind)
- Consistent temperature for reliable extraction
- Removable reservoir makes refilling and cleaning simple
Cons:
- No built-in grinder; you’ll need a separate burr grinder
- No “Over Ice” or specialty concentrate mode on this model
- Paper filters can mute oils unless you use a gold-tone filter
My Recommendation
If you want flexibility without fuss, this brewer is a smart buy. ninja coffee maker rich vs classic on this model lets you swing from clean and smooth to bold and creamy with one button. Use Classic when you sip black coffee. Use Rich when you add milk, creamer, or love a deeper body. A quality burr grinder will help both modes shine. For family use or shared kitchens, it’s easy to program and easy to love.
| Best for | Why |
|---|---|
| Classic Brew Drinkers | Smooth, balanced cup that suits light-to-medium roasts |
| Rich Brew Fans | Bolder flavor and thicker body; great with milk or creamer |
| Busy Households | 60 oz reservoir, timer, and warming plate keep mornings easy |
Ninja coffee maker rich vs classic: what really changes in the cup?
The heart of ninja coffee maker rich vs classic is extraction. Classic aims for a balanced profile with a cleaner finish. Rich increases body and perceived strength. It does that by changing how water meets the grounds, how long the contact lasts, and how the machine manages flow. You feel it as a fuller mouthfeel and a bolder taste. If you drink black coffee, Classic often wins. If you add milk or want a stronger flavor signal, Rich shines.
In plain terms, Classic is your everyday drip, well-rounded and easy to drink. Rich tastes more concentrated, like a fuller version of the same coffee. It is not “espresso” and should not be. But it supports milk, sugar, syrups, and foam much better than Classic. Think of Classic as your standard base. Rich is Classic with a confident voice.
Flavor and body: how Rich vs Classic tastes
When you brew Classic, acids and sweetness feel balanced. The finish is light, and the cup is easy to sip. It highlights origin character on light-to-medium roasts. With Rich, sweetness deepens, body thickens slightly, and aromatics feel more saturated. Bitterness can rise with darker roasts, but not in a harsh way if your grind and ratio are right. That is the key to ninja coffee maker rich vs classic: small changes in grind and dose can push your cup from wow to meh.
If your coffee tastes thin on Classic, try a slightly finer grind. If Rich tastes a bit bitter, coarsen the grind or reduce dose. You can tune within 2–3 brews. Once dialed in, your morning becomes predictable and delicious.
Does Rich have more caffeine than Classic?
Caffeine depends more on dose and total water than the brew button you press. Rich will taste stronger per sip because it concentrates flavor and body. But if you use the same amount of coffee and water, total caffeine across the carafe stays similar. If you want more caffeine, increase grounds or brew more total volume. Don’t rely on ninja coffee maker rich vs classic to change caffeine dramatically. Use it to change flavor and feel.
Best beans for Rich vs Classic
- Classic: Light to medium roasts shine. You’ll taste citrus, floral, and crisp fruit notes.
- Rich: Medium to medium-dark roasts excel. Cocoa, caramel, nut, and spice notes pop.
- Dark roasts: Use Rich sparingly or tweak grind coarser to avoid bitterness.
If you love single-origin beans, Classic lets origin character sing. If you love café-style drinks at home, Rich supports syrups, oat milk, or sweet cream without getting drowned out. That’s the beauty of ninja coffee maker rich vs classic—you can adapt each bag of beans to your taste.
Grind size, filters, and ratios that work
Use a medium grind for drip brewers like this Ninja. Think kosher salt, not powdery and not rocky. A burr grinder matters. It keeps particle size even, so extraction stays sweet and not bitter. For paper filters, expect a cleaner cup with less oil. For gold-tone or mesh filters, expect more body and richer oils in the cup. Both are valid; it’s your style call.
For Classic, start at about 1:16 coffee-to-water by weight. For Rich, aim nearer 1:15. If you use the Ninja scoop, follow the carafe marks and add one extra scoop for Rich if you want more pop. Adjust in small steps. The point of ninja coffee maker rich vs classic isn’t rules. It’s a shortcut to your sweet spot.
Small-batch brewing (1–4 cups)
The Ninja brewer handles smaller batches well if you adjust. Use a slightly finer grind for 1–4 cups so extraction does not stall. Drink right away since small volumes cool fast. For Classic small batches, keep to medium-fine. For Rich, pull back a touch if you notice bitterness. With ninja coffee maker rich vs classic on small batches, it’s easy to find a cafe-level mug in two tries.
Milk drinks and “lazy latte” style
Rich brew is your friend if you add milk. It keeps flavor clear when dairy or oat milk enters the cup. Heat milk separately and froth with a handheld frother if you want a café feel. Add Rich coffee to the cup first, then milk. The base will stay bold. Classic can still work with milk, but the cup may feel lighter. For a simple morning routine, Rich plus warm milk is hard to beat.
Over ice, cold foam, and summer brewing
This model doesn’t have a dedicated “Over Ice” button, but you can hack it. Use Rich, fill your cup with ice, and brew a smaller volume directly over it. The concentrated hot coffee melts ice and lands at a pleasant strength. For a smoother sip, add cold foam on top. Classic over ice can taste a bit thin unless you reduce brew volume. This is where ninja coffee maker rich vs classic leans Rich most of the time.
Brew temperature and time, simplified
The Ninja brewer targets a hot range ideal for extraction, which helps avoid sour or burned flavors. Rich often slows flow and saturates grounds a bit more. Classic keeps things moving at a steady clip. Both land in the sweet zone for daily coffee. If your brew tastes sour, grind finer or raise dose. If it tastes bitter, grind coarser or lower dose. These tiny tweaks do more than the button on many days. But the button gets you 80% there.
Paper vs reusable filter: which is right for you?
Paper filters trap more oils. Your cup will taste cleaner, with a lighter body. Reusable filters let oils pass. The cup feels richer and fuller. For Classic, paper brings clarity and sparkle. For Rich, a reusable filter deepens body even more. If you’re chasing pure flavor notes, choose paper. If you love creamy mouthfeel, go reusable. With ninja coffee maker rich vs classic, your filter choice becomes a second dial you can turn.
Troubleshooting weak or bitter coffee
- Weak cup on Classic: a finer grind, slightly more grounds, or switch to Rich.
- Weak cup on Rich: add one scoop, or hold grind steady and reduce total water.
- Bitter cup on Rich: coarsen grind a notch, drop a scoop, or try Classic.
- Bitter cup on Classic: coarsen grind slightly and brew fresh beans.
- Flat taste: check water freshness, clean the machine, and use filtered water.
Most problems vanish when you use fresh beans, a burr grinder, and clean water. The ninja coffee maker rich vs classic button should be a flavor choice, not a band-aid. Fix basics first, then choose the mode that fits your taste.
Cleaning, descaling, and taste consistency
Clean parts that touch coffee weekly. Descale when the machine alerts you or every 1–3 months based on water hardness. Build-up forces the brewer to run longer or hotter, which shifts flavor. A clean machine makes the difference between a bright, sweet cup and a muddy one. The warming plate should be clean too; oil residue can create off smells. A quick wipe is enough.
How I test ninja coffee maker rich vs classic at home
- Pick one bag of beans and a stable grind setting.
- Brew Classic first to find a balanced baseline.
- Taste black. Note sweetness, acidity, and finish.
- Brew Rich with the same dose and water.
- Taste black again. Note body, sweetness, and any bitterness.
- If Rich is slightly bitter, coarsen grind one notch and re-test.
- If Classic is thin, add 1–2 grams of coffee or grind finer.
Within three brews, you’ll know exactly when to use each mode. That’s the power of ninja coffee maker rich vs classic—fast iteration with clear feedback in the cup.
Myth-busting: strength, caffeine, and roast
- Rich does not guarantee more caffeine. Dose and water control that.
- Dark roast is not “stronger.” It is more roasted. Strength is extraction and ratio.
- Classic is not “weak.” It’s balanced and clean. Weak coffee comes from under-extraction.
Use the right grind, fresh beans, and a clean machine. Then pick the profile that matches your style. ninja coffee maker rich vs classic is a taste choice, not a health or buzz choice.
Comparing Ninja to “strong” buttons on other brewers
Many drip brewers have a “strong” or “bold” mode. They often slow the flow or pause mid-brew to increase contact time. Ninja’s Rich is similar in intent, but the execution feels more consistent across different batch sizes. Classic keeps things clean and reliable. That’s why the ninja coffee maker rich vs classic experience feels more useful than a simple “strong” toggle on generic machines. You get two dependable cups, not a gimmick.
When to choose Classic over Rich (and vice versa)
- Choose Classic if you drink black coffee or love crisp flavors.
- Choose Rich if you add milk or want more body.
- Classic for light roasts; Rich for medium to medium-dark.
- Classic for long sipping; Rich for a satisfying, shorter cup.
I often start my week on Classic to taste a new bag. Midweek, I shift to Rich when I crave a cocoa-heavy mug with creamer. The ability to toggle is the secret weapon in ninja coffee maker rich vs classic.
Water matters more than you think
Use filtered water with moderate mineral content. Too soft yields flat coffee. Too hard leaves scale and dulls flavor. If your coffee tastes “off,” change your water before changing your beans. Water quality has a bigger effect than most people realize. It’s the quiet partner in every brew and a major factor in the ninja coffee maker rich vs classic results you feel.
Dialing in for guests and households
Brewing for different palates? Brew a Classic carafe for general taste. Offer Rich for those who add milk or want a bolder mug. If you have time, split a carafe into half-classic and half-rich runs at smaller volumes. The Ninja will handle that without breaking your morning flow. Everyone gets their style. That’s how ninja coffee maker rich vs classic turns into a crowd-pleaser.
Accessories that elevate your coffee
- Burr grinder: Keeps grind even for clean extraction.
- Scale: Measure dose to repeat great cups.
- Reusable filter: Adds body and oil for Rich mode fans.
- Thermal carafe (if compatible model): Holds heat without a hot plate.
- Hand frother: Creates café-style milk for Rich mornings.
You do not need all of these on day one. If you pick one, choose a burr grinder. It makes the biggest difference to both Rich and Classic. Then watch ninja coffee maker rich vs classic come alive in your cup.
Advanced tips to fine-tune your cup
- Bloom the grounds: If your Ninja allows a mid-brew pause, let grounds soak for 30 seconds.
- Stir the slurry: A light swirl mid-brew evens extraction in some carafes.
- Rotate beans: Try a light roast on Classic and a medium roast on Rich each week.
- Mind the warm plate: Set it low for longer holds to avoid cooked flavors.
These are small touches. But they add up. When paired with ninja coffee maker rich vs classic, you can shape your cup like a pro.
Who should buy a Ninja with Rich and Classic?
If you want one machine that pleases different tastes, it’s ideal. Classic suits black coffee lovers and light-roast fans. Rich serves those who want weight, chocolate notes, or milk drinks. If you ever feel stuck with “flat” coffee, this duo gives you an easy way out. I’ve found that a simple switch to Rich can rescue a bland bag, and Classic corrects a roast that feels too heavy.
Common mistakes and quick fixes
- Using pre-ground coffee: It stales fast. Grind fresh if you can.
- Ignoring cleaning: Oils build up and cloud flavor.
- Too fine on Rich: Leads to bitterness. Step back a notch.
- Too coarse on Classic: Leads to sourness. Go finer.
- Wrong filter for your goal: Paper for clarity; reusable for body.
The right path is simple. Keep the machine clean, grind fresh, choose your mode thoughtfully, and taste with attention. That is the core skill behind ninja coffee maker rich vs classic.
FAQs Of ninja coffee maker rich vs classic
Does the Rich setting make coffee stronger or just bolder?
Rich makes coffee taste bolder with more body. It may not increase total caffeine. It changes extraction and concentration, not the bean’s caffeine content.
Which setting is better for black coffee?
Classic is better for most black coffee drinkers. It’s balanced and smooth. Rich is great if you want a heavier, more intense cup.
What grind size works best for each mode?
Start with medium for both. For Rich, go slightly coarser if you taste bitterness. For Classic, go slightly finer if the cup is thin or sour.
Can I brew over ice with these settings?
Yes. Use Rich and brew a smaller volume over a full cup of ice. It helps avoid a watery iced coffee.
Do I need different beans for Rich vs Classic?
No. One bag can work for both. But light roasts excel on Classic, while medium roasts often shine on Rich.
Final Verdict: Which Should You Buy?
Choose Classic when you want a smooth, balanced cup. Choose Rich when you want more body, boldness, or milk-friendly flavor. The magic of ninja coffee maker rich vs classic is that you can get both styles from one machine.
If you drink black coffee and value clarity, use Classic. If you prefer a fuller, café-style mug, use Rich. That’s the simple, reliable way to win your morning.